

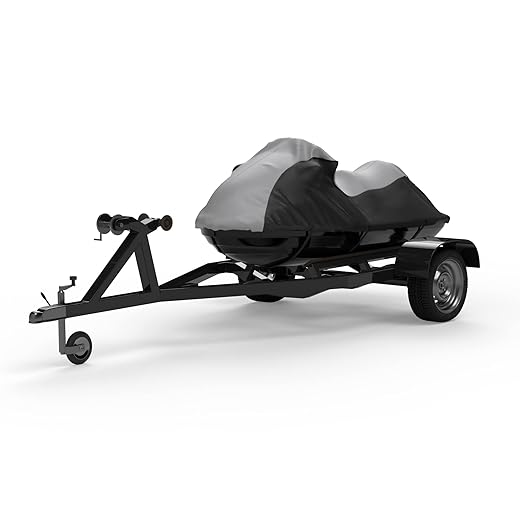
This step-by-step guide on customizing a Sea-Doo GTI SE 170 is designed to help jet ski enthusiasts unlock the full potential of their watercraft. While the GTI SE 170 delivers impressive performance standard, the guide outlines practical modifications—from upgrading the impeller and enhancing the exhaust system to adjusting the suspension—that can elevate speed, acceleration, and handling. By following these tailored tips, readers will be able to address their need for a more thrilling and responsive riding experience, ensuring that every outing on the water is as exhilarating as possible.

Assess Your Current Setup
Evaluate your current setup by taking a comprehensive look at your performance metrics. Identify specific areas like speed, acceleration, or handling that you want to improve. Record any relevant data, such as lap times, top speeds, or how your vehicle responds during sharp turns. Use a notepad or an app to keep track of these observations for easy reference.
Analyze how each performance aspect affects your overall experience. Look for patterns in your driving style or conditions that may contribute to underperformance. Discuss these findings with fellow enthusiasts or experts to gain insights. This detailed assessment forms the foundation for choosing the right upgrades that align with your objectives.
Upgrade the Impeller
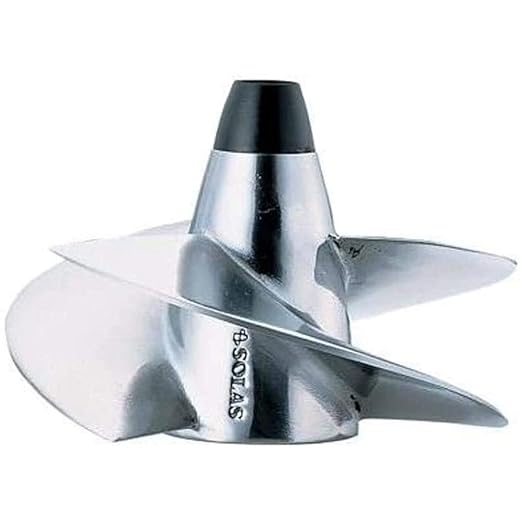
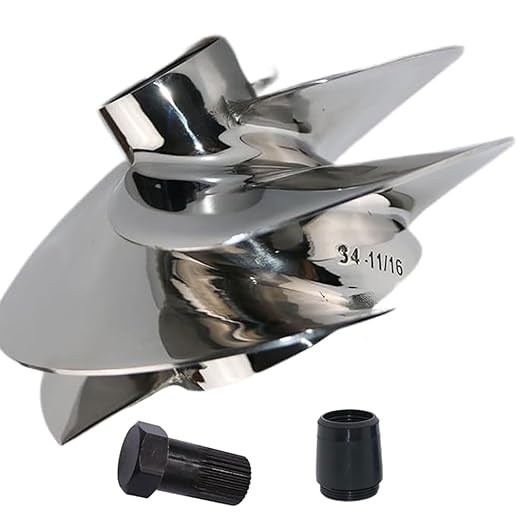
Replace the stock impeller with a performance impeller specifically designed for your model. Upgrading your impeller can lead to significant improvements in thrust and efficiency, which ultimately results in enhanced acceleration and higher top speeds. Consider the following benefits when selecting a performance impeller:
- Increased Thrust: A high-performance impeller typically features improved blade design that maximizes water flow, resulting in more powerful thrust.
- Better Efficiency: Performance impellers are engineered to operate more efficiently, reducing the power required from the engine while maintaining or increasing speed.
- Improved Acceleration: By upgrading, you’ll notice quicker response times and snappier acceleration when you hit the throttle.
Research models specifically made for your vessel and compare their specifications. Install the new impeller by following these steps:
- Disconnect the battery to ensure safety.
- Remove the access panel or cover to reach the impeller housing.
- Unscrew the old impeller from its casing carefully.
- Align the new performance impeller with the mounting points and secure it in place.
- Reattach any covers or panels you removed earlier.
- Reconnect the battery and run your vessel to test the upgrades.
Keep an eye on your performance metrics. If you’re able to pinpoint the exact gains from your new impeller, you’ll gain valuable insight for future modifications.
Install a Performance Exhaust System
Upgrade your exhaust system to a performance variant for noticeable benefits in engine efficiency. Choose a high-flow muffler or a cat-back exhaust system, which are designed to reduce back pressure and improve exhaust flow. When selecting a muffler, look for one with larger piping that allows for higher volumes of exhaust gases to exit your vehicle. This can help your engine breathe better, resulting in improved power output.
Install the new exhaust system by first lifting your vehicle for better access. Unscrew the existing exhaust components and detach them carefully, ensuring you keep any necessary brackets or hangers. Follow the manufacturer’s instructions to fit the new system, using new gaskets for a proper seal. Once secured, double-check all connections, then start your engine to listen for a deeper, sportier sound. If everything sounds great, take your car out for a test drive to enjoy the enhanced driving experience!
Tune the ECU
Reprogram the engine control unit (ECU) by connecting a compatible tuning device or software to your vehicle’s OBD-II port. Ensure you have the right performance tune loaded onto your device, which should enhance fuel delivery and adjust ignition timing. Follow the prompts on your device carefully, making sure to select the correct engine type and parameters for your specific vehicle model. Once ready, initiate the reprogramming process and allow the device to overwrite the factory settings with your new performance map.
Monitor the progress on the screen as the tuning device communicates with the ECU. Upon completion, safely disconnect the device and turn on the ignition to reset the ECU. Start the engine and let it run for a few minutes, checking for any irregular sounds or dashboard warning lights. You may notice improved throttle response and an increase in horsepower, so take the vehicle for a test drive to experience the enhanced performance firsthand. Adjust driving habits to take full advantage of the new tuning, ensuring you maintain proper vehicle care and monitoring after the modification.
Upgrade the Intake System
Install a high-performance air intake system by first gathering the necessary tools and parts, including a new air intake kit tailored for your vehicle’s make and model. Begin by disconnecting the negative terminal of the battery to ensure safety. Remove the factory air intake system by carefully unfastening the clamps and bolts, making sure to keep track of all components for easy reinstallation later if needed.
Next, align the new air intake system with the mounting points in the engine bay and secure it using the provided hardware. Ensure that all hoses and connections are tight to prevent any leaks. After everything is in place, reconnect the battery terminal. Start the engine and listen for any unusual sounds, indicating any potential issues with the installation. Enjoy the enhanced airflow that can lead to better combustion efficiency, giving you a noticeable increase in power output and responsiveness during your drives.
Reinforce the Hull
Reinforce your hull by considering aftermarket kits or high-quality materials designed specifically for this purpose. Look for fiberglass or carbon fiber reinforcement products that can add structural integrity while minimizing added weight. Follow the manufacturer’s instructions for installation, ensuring you prepare the surface properly for adhesion.
Enhance stability by applying additional layers or supports in areas most susceptible to flexing. Prioritize those zones that endure the most stress, such as the transom and keel. This increased rigidity will not only improve your boat’s handling at high speeds but also reduce water resistance, allowing for a smoother ride and potentially better fuel efficiency.
Regular Maintenance and Adjustments
Schedule regular maintenance appointments based on your vehicle’s mileage and manufacturer’s recommendations. Change the engine oil and replace oil filters every 3,000 to 7,500 miles, depending on the type of oil used and your driving habits. Check the air filter and replace it every 15,000 to 30,000 miles to ensure optimal airflow for the engine. Inspect fuel filters at recommended intervals to keep your fuel system clear and efficient.
Examine vital components such as the brakes, tires, and battery during each maintenance session. Rotate and balance tires every 5,000 to 7,500 miles to promote even wear and prolong tire life. Monitor fluid levels—brake fluid, coolant, and transmission fluid—and top them off as necessary to maintain performance. Regularly check belts and hoses for signs of wear or damage, and replace any that show signs of fraying or cracking. Implementing these practices will ensure your vehicle operates smoothly and efficiently for years to come.
Maximizing Your Riding Experience
In conclusion, customizing your Sea-Doo GTI SE 170 not only enhances its performance but also elevates your overall riding experience. By taking the time to assess your specific needs and selecting the right upgrades, you can transform your jet ski into a more thrilling and responsive machine. Don’t forget the importance of regular maintenance to keep everything running smoothly. With the right approach, you’ll be ready to enjoy the water like never before!
Essential Equipment List
Performance Enhancements
Essential Steps for Operating Your Sea-Doo GTI SE 170: A Comprehensive Guide
- Familiarize Yourself with Controls: Before you hit the water, take some time to understand the throttle, brakes, reverse, and other controls. Read the user manual to know what each button does
- Wear Proper Safety Gear: Always wear a life jacket that’s approved for use. It’s also a good idea to wear appropriate clothing and consider using a wetsuit or swimsuit, depending on the temperature
- Start on Calm Waters: Begin your riding experience in a calm and shallow area. This will help you get comfortable with the handling and speed of the Jet Ski without too many obstacles
- Practice Basic Maneuvers: Get used to starting, stopping, and turning. Try to accelerate and decelerate smoothly, and practice making gentle turns to gain confidence in handling
- Know the Regulations: Make sure you’re aware of local regulations for operating a jet ski, including speed limits, no-wake zones, and other guidelines. Safety and adherence to rules are key to enjoying your ride!
- Enjoy your time on the water and have fun!


